I have just finished this Austrains 44237. I have had this one sitting around for a long time in various stages of work. But I had a few of these Jumbo's on the bench so I decided to bite the bullet and finish it off. This was a major detailing job similar to my 8002 that I have Blogged previously. I am not going to go into this detailing. My main aim of this Blog is to show it off.

I have detailed this jumbo up to a reasonable standard. There are other things that I could of done but there is a point that I have to stop or I will never get anything finished. Here is a bit of a Photographic essay of the work done to this loco.

I realised I made a mistake here. I did both pilots the same. The pipe work at the top of the pilot is a mirror image on the other end of the loco as the pipes only run down one side of the loco. When I do the next Jumbo I will do them the other way around and swap one pilot of this loco

Some pipe detail on the bogies. On my 8002 project I cut up parts of the bogies so that I could get all the wheel Journals in the right locations. I haven't done that with this one and that will bug me for a while. I may have to revisit this at a later date as I now have many spare side frames to play around with. So the fact that there is 2 Speedo locations on the bogie will get fixed one day.

The pilot fitted with KD 58 Couplers. For the Paintwork on this Loco, I resprayed the Red with a coat of light Grey. I let it harden for a couple of weeks then sprayed a faded coat of Railey's Candy Red with a little bit of Floquil Grime mixed it. I then went about lightly sanding the paint to try and give the effect of years of steam cleaning on the paint. Areas that I wasn't happy I went over with some of the light grey with a brush.

This was the result of the sanding back

For the staff exchangers I used ILM 80 class exchangers. The Jumbo Staff Exchanger Pocket is a bit wider then the 80 class so I widened the Exchanger to suit as seen in these pictures


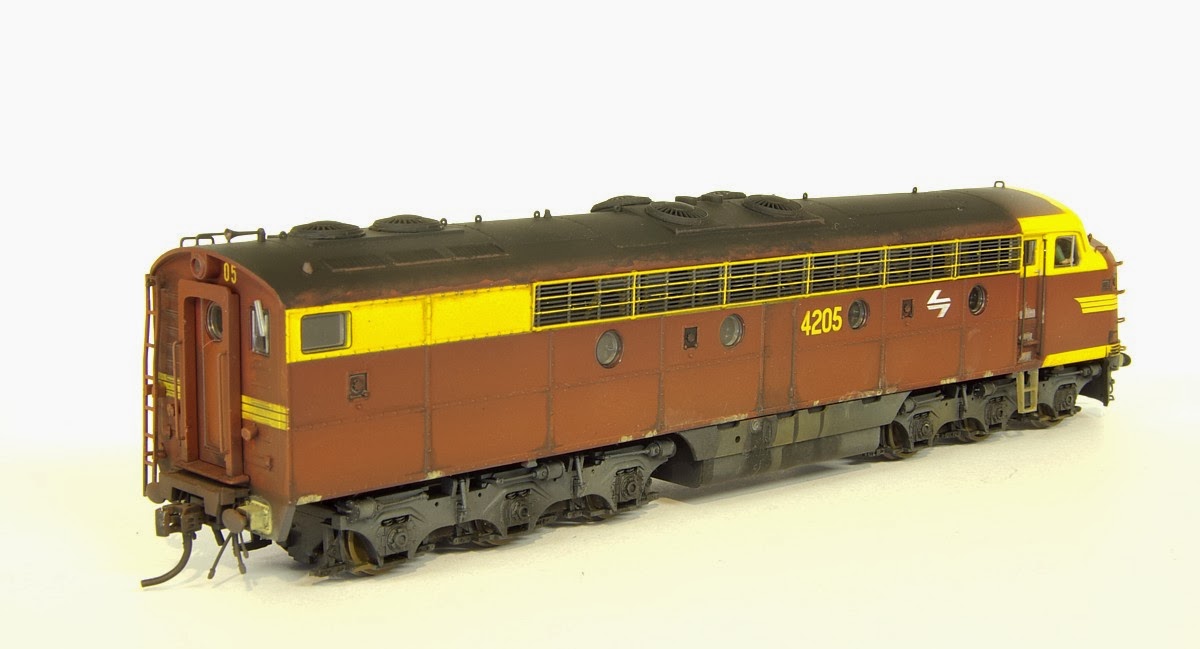
This picture was the loco at the stage of decaling and finishing off the weathering

Most the detailing work was done. There was just the hand rail and grab iron detail to add.
This is the finished product. I will go into more detail when I do some more Jumbo's. I have put cab interior detail in this Jumbo. I used some spare parts from an Auscision 422 class that I had lying around for the interior. I will need to construct interiors on future models and also the update the 3 other Jumbo's that I have running so I will detail this work then.


On the number 2 end there is no crew and the blinds are pulled most of the way down. In the early 90's there was a ban on Jumbo's leading by the number 2 end.


A coupe of the Prototype thanks to Dave Porter


One to finish off

Cheers Justin Moy